What’s Missing & How to Fix It
At the end of this post you will know how to link your Garmin Edge to the Intervals.icu platform and have better control your long term power based fitness performance.
You may also watch the video
Remember that I share my interpretation, approach and practical use of cycling training concepts using a GPS bike computer.
Become a self coached cyclist with the guidance of The Self Coached Cyclist Training with Power, covering everything from training concepts to performance tracking.
and check out our Power Based Training Plans.
Garmin Connect is a wonderful platform that has almost everything needed to train with power using a Garmin Edge bike computer and a power meter.
And by almost, I mean that although you can see your Training Load and Training Status performance charts, they are based on heart rate and not power.
To track your fitness over time with power, there is no better tool than the Power Management Chart, not available in Garmin Connect.
That is why I use the Intervals.icu platform that has a graph called Fitness Chart, a great implementation of the Power Management Chart.
Intervals.icu is a very powerful platform with an extensive set of training tools for several sports that is worthwhile to give a look at.
In this post we will see the initial configuration needed to link Garmin Connect to Intervals.icu and use the Fitness chart to track long term cycling performance using power.
At the time of editing this post, Intervals.icu is free to use though it will suggest to support its development with a $ 4.00 USD monthly contribution. Do so!
Create an Intervals.icu Account
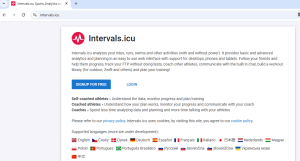
Browse to intervals.icu and select Signup For Free to open an account.
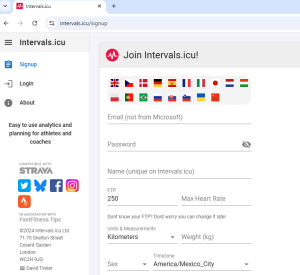
You will be asked to enter your information as shown here
Once your account is ready you will see the main screen. Let’s navigate the Interface for an Overview. On the top left you will see your account name and profile picture if uploaded it during registration.
Clicking on the menu icon will open the contents, that are as follows:
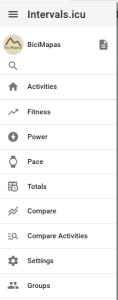
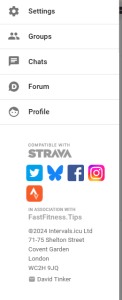
Account. Clicking on your profile image will open your account.
Activities. Opens a calendar that has a large number of functions such as Activity Record, Workout and Training Planning Calendar.
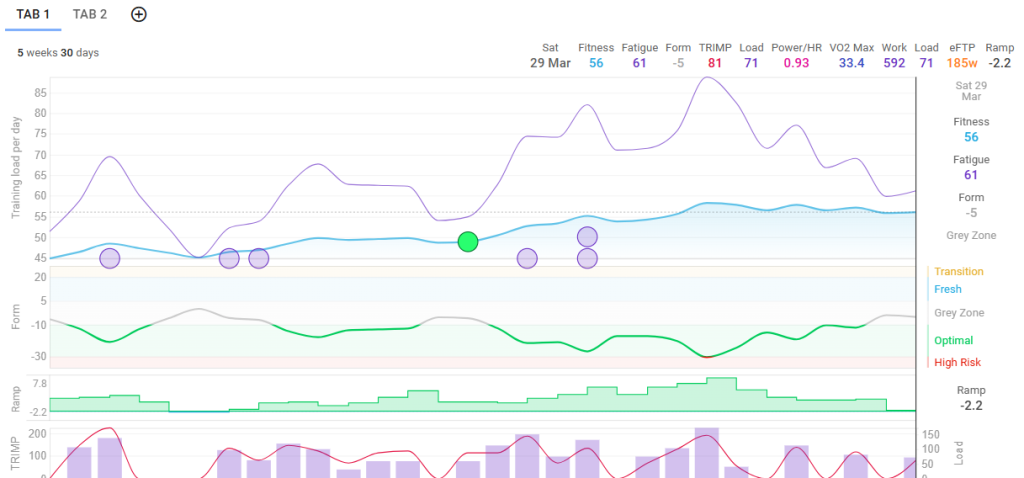
Fitness. Shows the Power Management Chart, known as Fitness Graph in this platform, that is used to track and assess your fitness which can also be used to verify whether your training plan, in case are following one, is yielding the expected results
This is the main screen we are interested in, one of the most valuable pieces of information that you can get from this platform.
Power. If you are training with a power meter, here you will be able to see advanced power data analysis.
Pace. For activities that measure load using Pace, here you will see the corresponding information.
Totals. Shows an overall summary of all the recorded activities based on time in zones as well as a classification of the type of training you are doing based on results such as Polarized, Threshold, HIIT and so forth.
Compare. Displays graphs comparing data such as power vs. heart rate, cumulative training load, fitness and others.
Compare Activities. Overlays activities on top of each other that can be used to track progression and other types of comparisons.
Settings. This is where you enter your general information, the activity types you do and the corresponding set up parameters, your power and heart rate information and the connection to devices or other platforms.
Groups. Allows to join groups of athletes that may have similar goals as you do. You can create your own groups as well.
Chats. Manage your chats with other members of the community
Forum. Access the Intervals.icu forum.
Profile. Set up your public profile where you can share information with other members
Settings
Select the settings menu option where you will see several tabs.
On top is the general information tab. Fill the self-explanatory settings and parameters:
The language you want to use from the list of options, your weight, units of measure for distance and temperature.
In Form, select whether you want the platform to use its absolute value or as a percentage of Fitness. Leave the default setting of Absolute value.
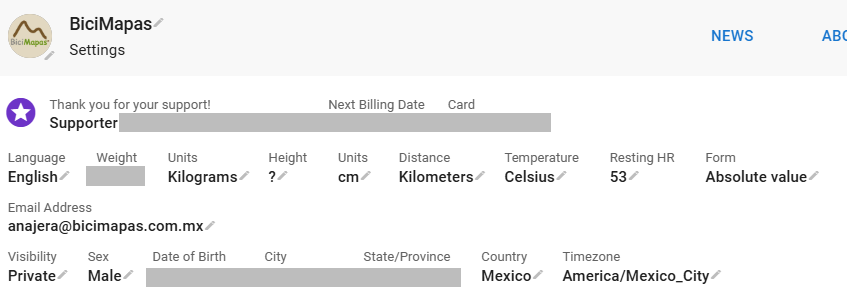
Your Email address, Sex, date of birth, City, State or Province, Country and the Time zone which is used to properly maintain time information when data is uploaded and downloaded among Garmin Connect and Intervals.icu.
Sports
Now go to the Sports section. It has several tabs to set up sport specific parameters. It includes Ride, Run and Swim as well as the option to add other sports not listed by default.
As we will use the platform for cycling
Ride Tab
Go to the Ride tab to enter the corresponding settings.

Activity Types.
Select the ones that apply within the Ride Category. Here I have selected the ones I do:
- Ride when I ride in pavement
- Virtual Ride for indoor sessions
- MTB
- Gravel
Warmup.
This parameter is used for the decoupling calculation.and does not impact the use of the Fitness Chart, so for now, leave the default value.
Cooldown.
Also for the decoupling calculation but now for the cooldown. Leave the default value as well.
Gear.
Select the default gear, bike in this case, to be considered in an activity. If you have more than one option, it can be edited within the activity data.
Indoor Gear.
Select the default indoor gear (stationary bike, trainer) to be considered in an activity. If you have more than one option, it can be edited within the activity data.
Training Load Priority.
Load can be measured in several ways based on power and heart rate for cycling and Pace for other sports.
This setting tells the platform the order it shall use to process load values. Select Power, HR, Pace.
Time in Zones.
In the totals menu option described above, the platform uses time in zone to get them depending on the data that is available.
Select Power, HR, Pace.
This setting lets the platform know what zones value either power, heart rate or pace shall prioritize to calculate the totals.
Workouts.
When creating Structured Workouts, let the platform know which targets to use in workout steps, shall there be more than one option.
Select Power, HR, Pace
Intervals.
Set the priority to create the Interval summaries for the sport. Select Power, HR, Pace.
Ignore Velocity
When set to NO, the time recording generated by the device will be used to calculate moving time.
Update Activities.
If you make any changes to any of these parameters after the initial set up, this option will apply them to all the previous activities before the change was made.
Make sure you really want to do that as this action is not reversible.
Power Settings Tab
Now select the Power Settings tab. These are the parameters needed when training with a power meter.
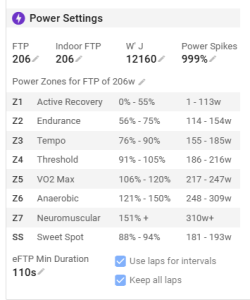
FTP/Indoor FTP
Enter your FTP in this field.
There is an option to enter an Indoor FTP if you have a different value for it.
Make sure the FTP values entered in these fields match the one you have in your Garmin Edge.
Power Spikes
If the platform identifies a sudden power peak that is larger than the percentage shown here compared with your power curve, it is considered an erroneous reading coming from the power meter and that should be corrected, actually modifying the raw data obtained from the activity.
In our experience, power spikes may also come from intentional interval training and this setting may be the cause of different performance statistics between the GarminConnect and Intervals.icu
After extensive testing, I decided to not let those corrections to be done.
There is no direct way to set this parameter to not correct, so the only option is to enter a very high value such as 999%.
Power Zones
They are automatically calculated using the FTP entered. Make sure they match with the ones you have in your Garmin, so that there is consistency among both.
If they do not match, you can edit them by touching the pencil icon in the “Power Zones For…” heading
eFTP min duration
Intervals.icu calculates an estimated FTP identified as eFTP for each ride. This is the minimum amount of time in seconds that the platform will use to estimate it. Leave the default setting.
Use Laps For Intervals and Keep all Laps
When using the Lap function in your device, let the platform know whether those laps shall be considered as an interval or not for analysis purposes.
Heart Rate Settings
Though heart rate data is not necessary to train with power, I highly recommend you do so. They complement each other. Heart rate is the input and Power is the output.
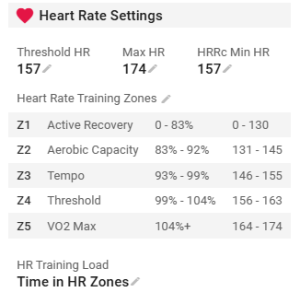
Threshold HR
Enter the value you got from your field or laboratory test.
Maximum Heart Rate
Enter the value of highest high rate you have reached while exercising.
HRRc Min HR
It is the minimum heart rate value that has to be reached to trigger recovery calculation after a hard effort. Should be equal or greater than your Threshold Heart Rate.
Heart Rate Zones
They are calculated based on the heart rate data entered but they may be edited by touching the pencil icon.
As with the power zones, make sure they match with the ones you have in your device so that there is consistency among both, as the calculation factors may be different in each.
HR Training Load
The platform provides 3 methods to calculate heart rate-based training load:
- HRSS is the predefined option for all sports.
- Time in Heart Rate Training zones which uses the TRIMP definition.
- And Average Heart Rate.
For now, leave the default set up. Eventually you can experiment which fits you best, as I have done and for now use time in heart rate zones.
This is the method to be used to calculate the load when there is no power data in the activity file, following the preferences entered in the Training Load Priority, Time in Zones and Workouts in the ride settings above.
Connections
Scroll down to the Connections section where you set the permits that allow for data to be exchanged between several devices, platforms and Intervals.icu.
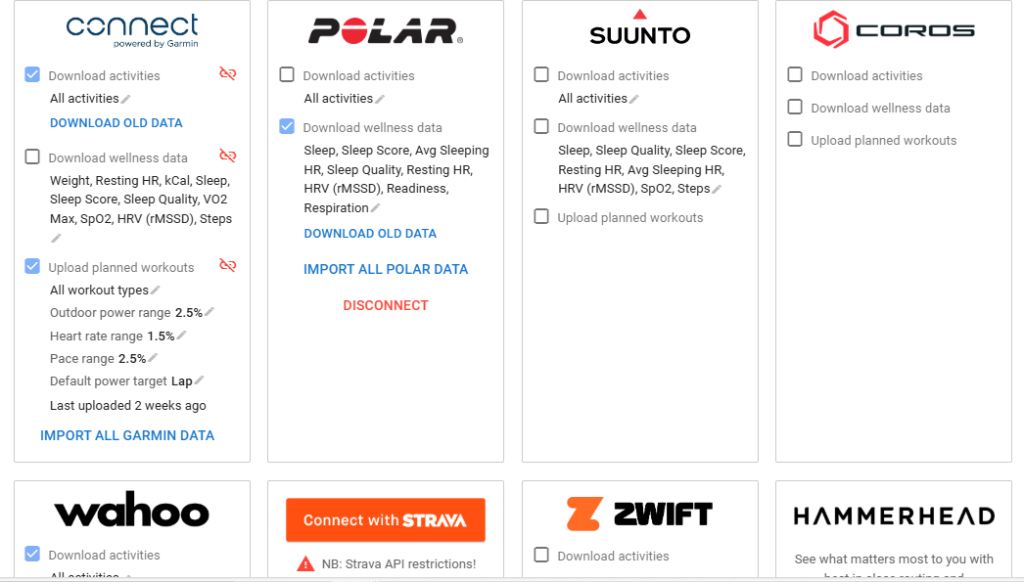
Go to the Gamin Connect window. The link is made through Garmin Connect.
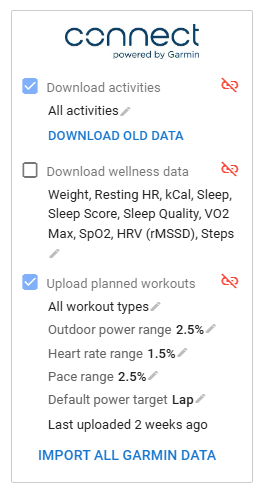
Check “Download Activities” and All Activities. Follow the instructions to grant the required permits among the 2 platforms.
After the connection has been completed, the next activity data you record in your device will be automatically transferred to the platform via Garmin Connect.
Touch “Download Old Data” to fetch previous activity data stored in Garmin Connect. If you have been training with power and are new to Intervals.icu, this option will get historical information that will fill up the calendar and fitness sections, speeding up the analysis and planning process.
If your device tracks wellness data such as HRV, Sleep Time and Quality and so forth, you have the option to activate downloading this data as well.
Finally, the platform has a tool to create planned structured workouts that can be transferred to your Garmin bike computer. Activate this option to send them to the device.
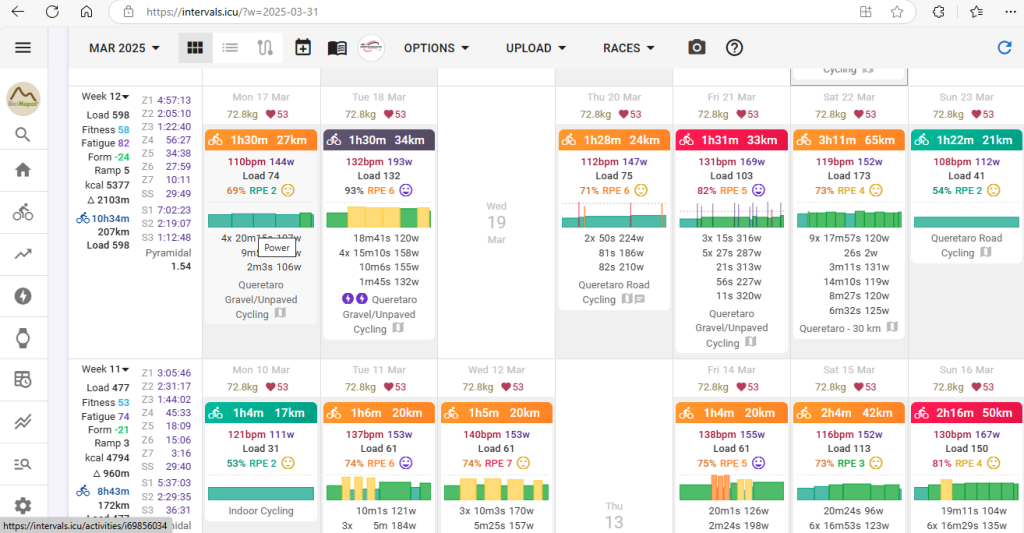
With all configured, check that all is working well.
If you downloaded old data stored in Garmin Connect, the activities should show in the calendar view, something like this
and the Fitness Chart something like this if you had power and or heart rate data in your activities
Also, the real time connection shall be tested as well. Go out for a ride with your device and upon finishing the activity and once the data is in Garmin Connect, check that it has been loaded to Intervals.icu as well.
To support your self coaching journey get our free guides that you can download right now, including:
The Self-Coached Cyclist Training with Power: Concepts
Advanced Cycling Planned Workouts in Intervals.icu Video Tutorial
Cycling Fitness CTL Planning Worksheet
The 2025 Cycling Fitness TSS & CTL Planning Worksheet
As well as our full featured eBook The Self Coached Cyclist Training with Power, covering everything from training concepts to performance tracking.
and check out our Power Based Training Plans.

