
At the end of this Blog you will know how to create a power based cycling planned workout in the Intervals.icu training platform and send it to your Garmin, Wahoo or any other supported device.
You may also watch the video
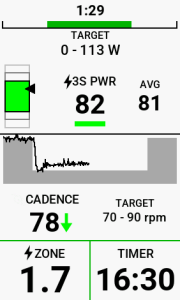
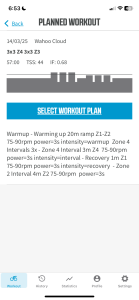
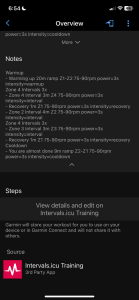
and in this one you will see how the planned workout shows in a Garmin Device
As a reminder, all the ideas shared in these Blog are the result of my interpretation, approach and practical use of cycling training concepts I have learnt for several years from recognized and reliable sources.
I am sharing them in an as simple as possible guide that includes what I consider to be the key elements to the very complex science of training using a GPS bike computer, as I understand and apply them, being myself a self coached cyclist.
Become a self coached cyclist with the guidance of The Self Coached Cyclist Training with Power, covering everything from training concepts to performance tracking.

and check out our Power Based Training Plans.
The Workout
- The workout we will create in this Blog is based on power as follows:
- Warmup: 20 minutes starting in Zone 1 and ramping up to Zone 2
- Repeat 3 times an interval of 3 minutes at zone 4 with one minute recovery.
- Followed by 4 minutes at Zone 2
- Then repeat 3 times an interval of 4 minutes at zone 3 with one minute recovery.
- Cooldown: 9 minutes Zone 2 to Zone 1
- For each step of the workout we want to maintain a cadence of 75 to 90 rpm as a secondary target.
Step 1
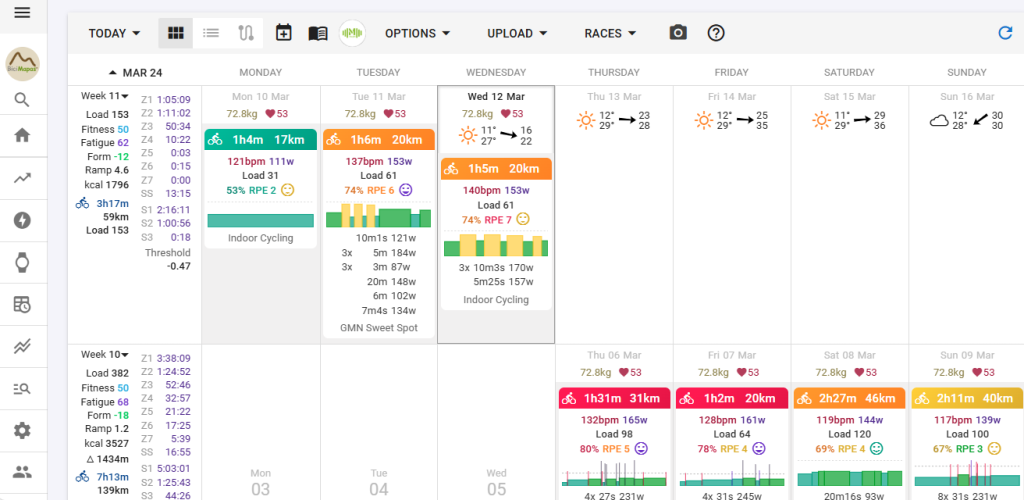
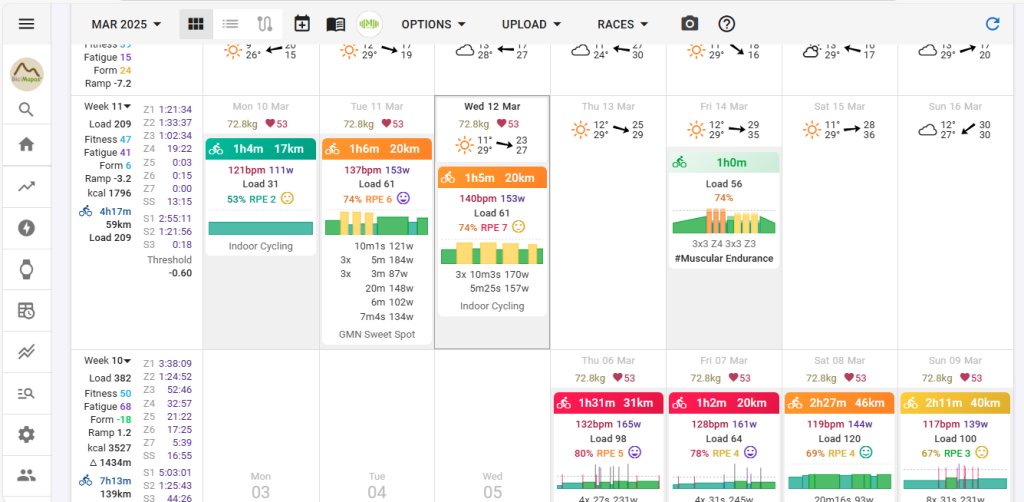
Access your Intervals.icu account and navigate to Calendar with the calendar view option.
Step 2
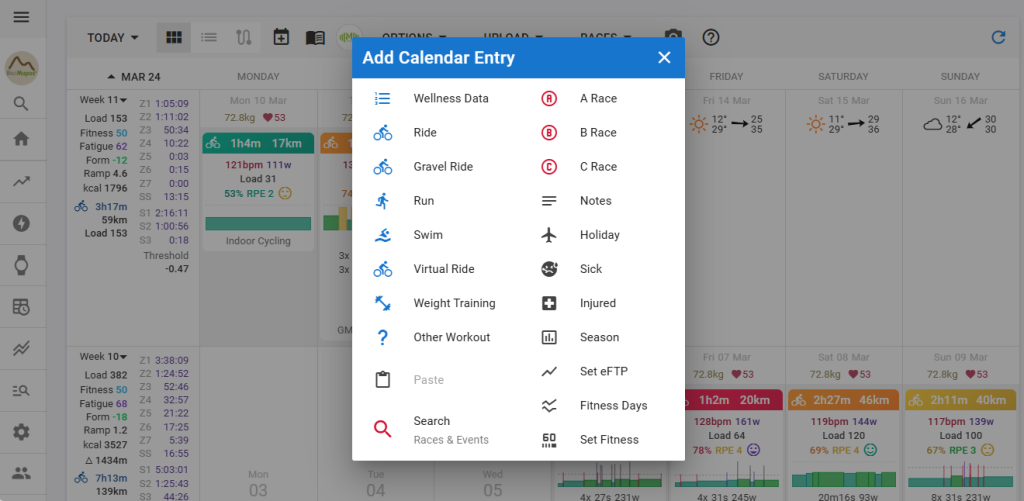
Select the date when you will do the workout and click on it. In the options that show select Ride.
Step 3
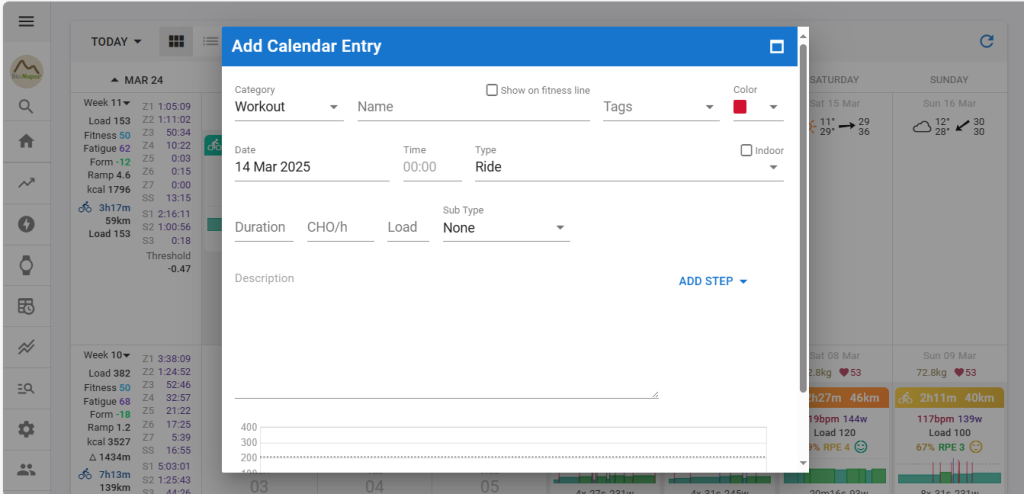
The Add Calendar Entry window shows. Make sure that Workout is selected in the Category option
Step 4
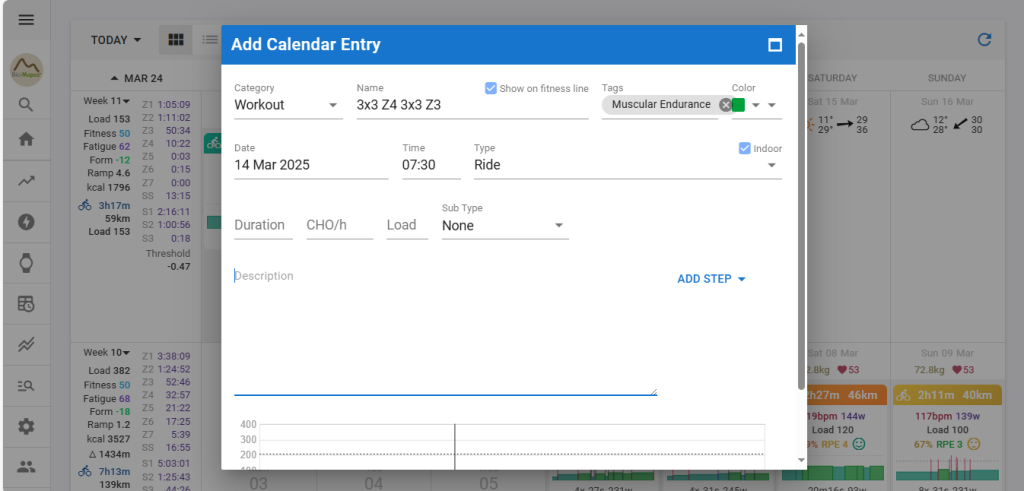
Give it a name so that you can easily identify it. We chose 3×3 Z4 3×3 Z3.
Checking the Show on fitness line will create a dot with the color selected in color over the Fitness line in the Fitness Chart.
You may add a tag in the Tags section. We entered Muscular Endurance
Make sure the Date where you will do the workout is correct.
Enter the time at which you will do the workout. Make sure not to leave the 00:00 default entry as it will lead to errors showing the workout in your device. When transferring it, Intervals.icu considers the time zone you are in to properly schedule the workout.
Select the type of ride for this workout, whether it is an indoor activity and a subtype if it applies.
The Duration, Load, Description and Graph sections will be filled automatically as you create the workout. The Description section will show the script that composes the workout.
CHO/h is a suggested value of carbohydrates per hour to be taken for the activity, should you have this information available. This is an optional field.
Step 5
Start creating the workout by clicking on ADD STEP
The step configuration window pops up. We will first enter the warmup data.
In Type we select Warmup.
In Duration enter the time, 20 minutes in this case as 20m.
As it is a power-based workout, we select the POWER tab.
If End when the lap button is pressed is selected, you will be able to stop this step of the workout and jump to the next one as long as you have a Garmin or Suunto device.
In the Power drop down menu, select Zone Range, Start with Z1 (zone1) and finish in Z2 (zone2)
The next field applies to Garmin devices that allow to select the type of target control to be displayed on the workout screen as shown in this image.
In target Garmin only, select the type you like from the list. We selected the 3 second option
In Text to display to athlete enter any text that you would like to see in the device to identify this step. We entered Warming up.
And in Intensity, we select Warmup as well
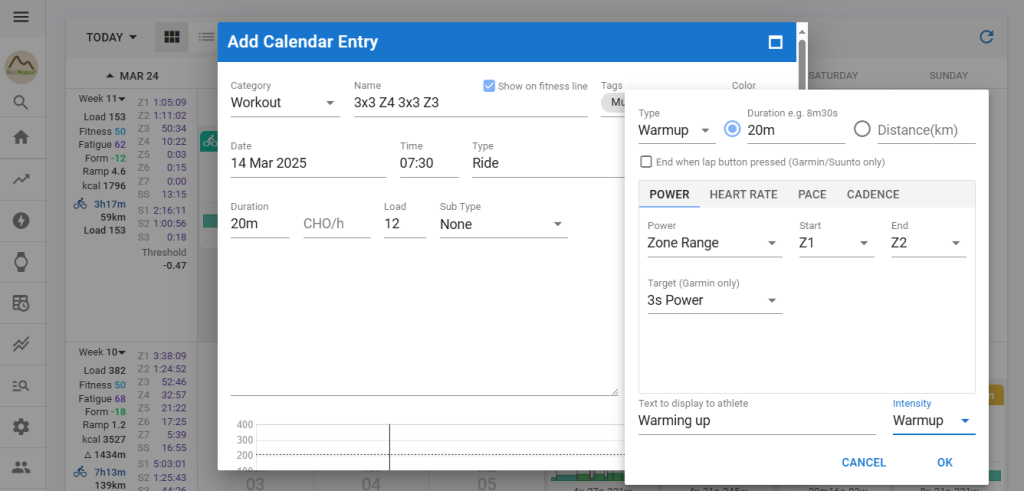
Click OK. The step is added to the Description and Graph sections.
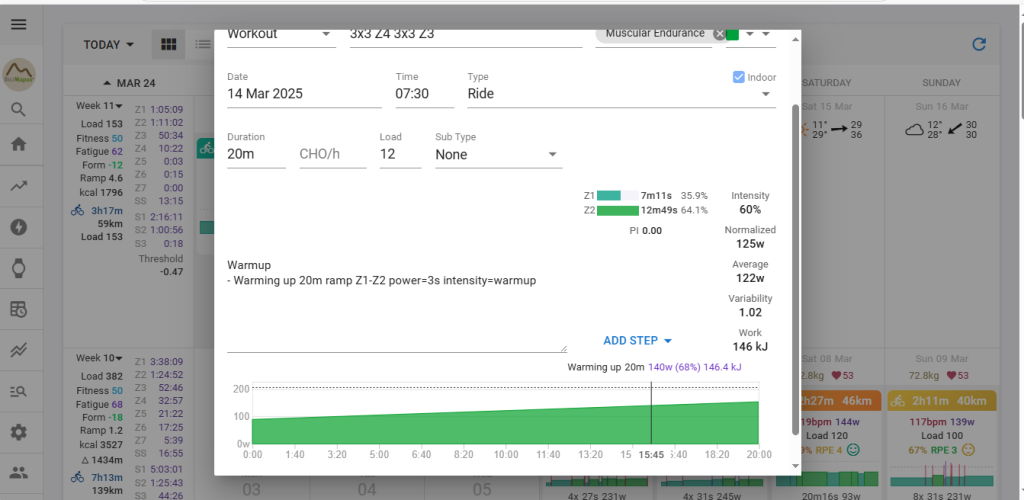
Click on ADD STEP to continue.
In Type we select Repeats.
This time the window has different options.
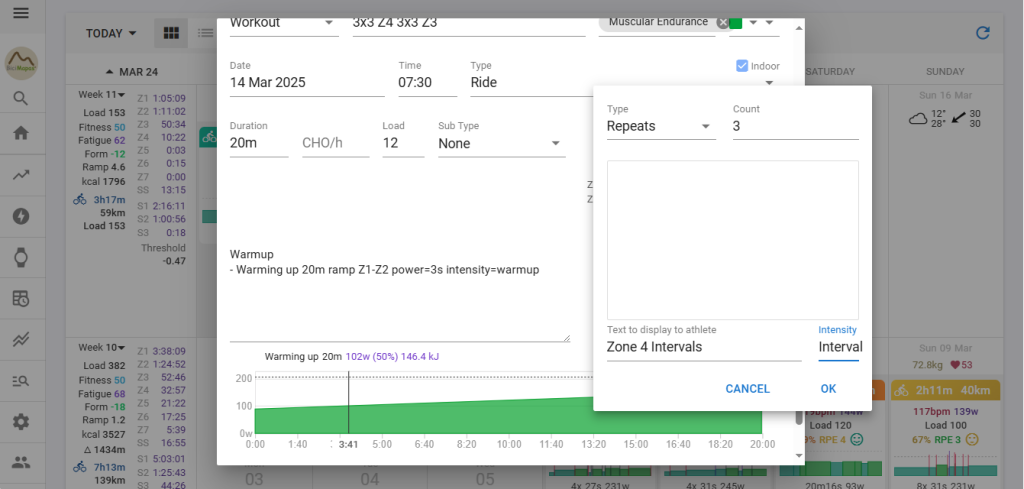
In Count enter the number of repetitions, 3 in this case.
In Text to display to athlete enter any text that you would like to see in the device to identify this step. We entered Zone 4 Intervals.
And in Intensity, we select Intervals.
Click OK.
The Description area now shows the text 3x indicating that the following entries shall be repeated 3 times. The graph has no changes.
Click on ADD STEP to continue.
In Type we select Normal.
In Duration enter the time, 3 minutes in this case as 3m.
As it is a power-based workout, we select the POWER tab.
In the Power drop down menu, select Zone with Z4 (zone4).
In Text to display to athlete enter any text that you would like to see in the device to identify this step. We entered Zone 4 Interval.
And in Intensity, we select Interval.
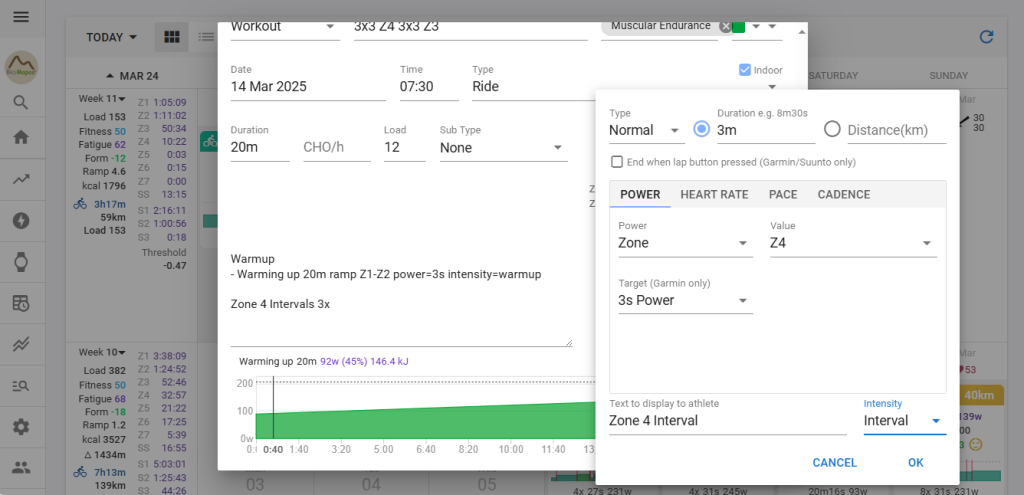
Click OK.
The step is added to the description and graph sections just below the 3x section created in the step before.
Click on ADD STEP to continue.
In Type we select Normal.
In Duration enter the time, 1 minute in this case as 1m.
As it is a power-based workout, we select the POWER tab.
In the Power drop down menu, select Zone with Z1 (zone1).
In Text to display to athlete enter any text that you would like to see in the device to identify this step. We entered Recovery.
And in Intensity, we select Recovery.
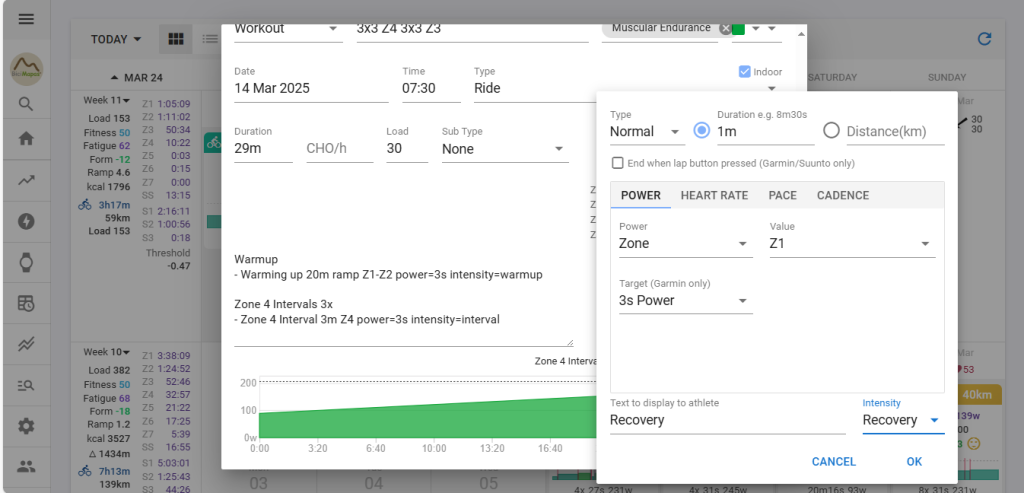
Click OK.
The step is added to the description and graph sections just below the 3x section created in the step before. Notice how each of the Interval parts are followed by the recovery ones
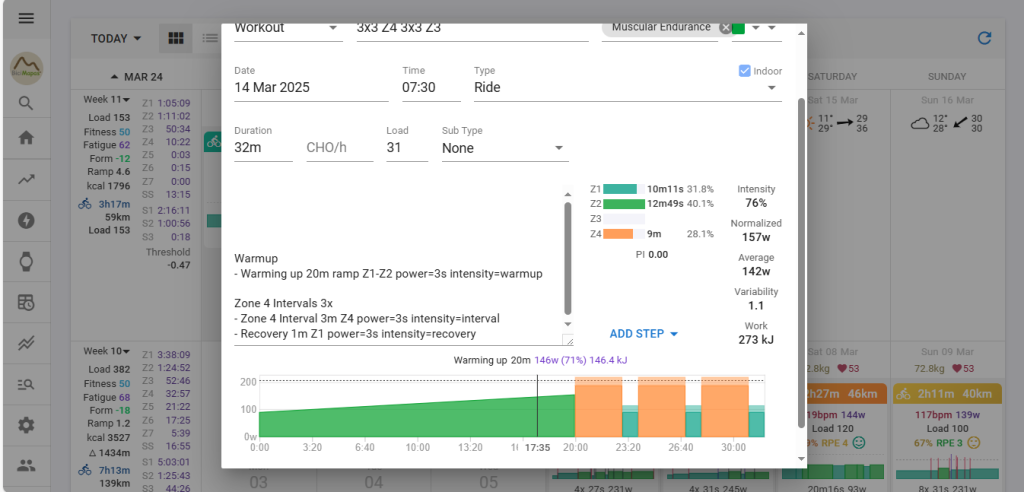
Now, let us add the intermediate Zone 2 section, which is not part of the 3x repeats.
Click on ADD STEP to continue.
In Type we select Normal.
In Duration enter the time, 4 minutes in this case as 4m.
As it is a power-based workout, we select the POWER tab.
In the Power drop down menu, select Zone and Z2 for zone 2
In Text to display to athlete enter any text that you would like to see in the device to identify this step. We entered Zone 2 interval.
And in Intensity, we select Interval.
Click OK.
The step is added to the description and graph sections, but it is just below the 3x section created in the step before, but that is not what we want.
To correct this, all you have to do is add a space in the Description section after the recovery line as shown here

Which is what we want.
To create the second interval repeats, you can follow the steps just explained but there is another faster way.
Copy the text of the first interval repeats from the Description section
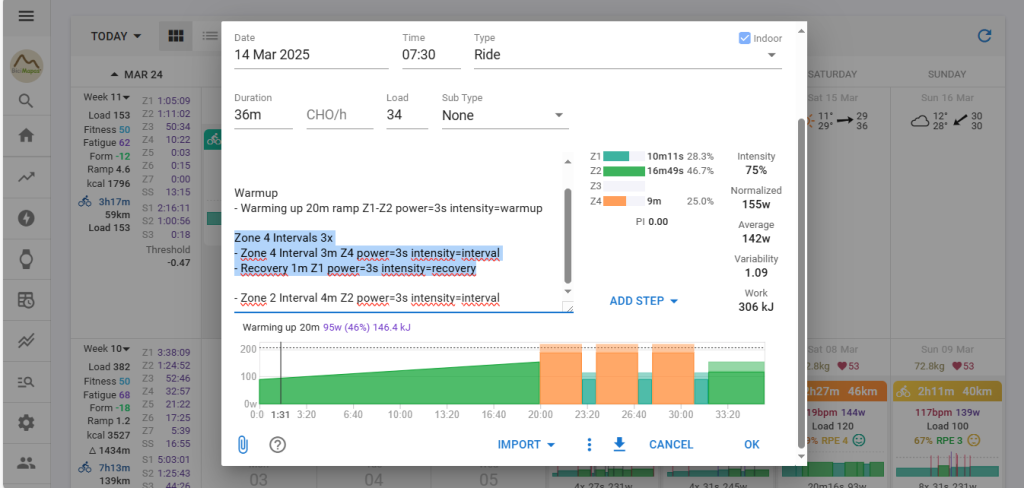
And paste it below the Zone 2 entry, making sure there is a space separating them
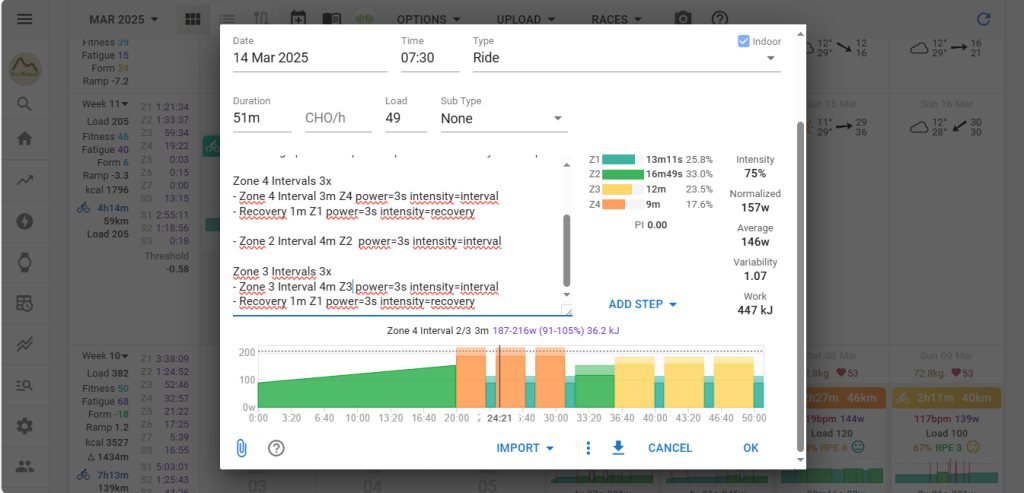
This will duplicate the interval steps which we will then edit in accordance to what we want on the second set as follows:
Change Zone 4 Intervals 3x to Zone 3 Intervals 3x
Then in this line
Zone 4 Interval 3m Z4 power=3s intensity=interval
to
Zone 3 Interval 4m Z3 power=3s intensity=interval
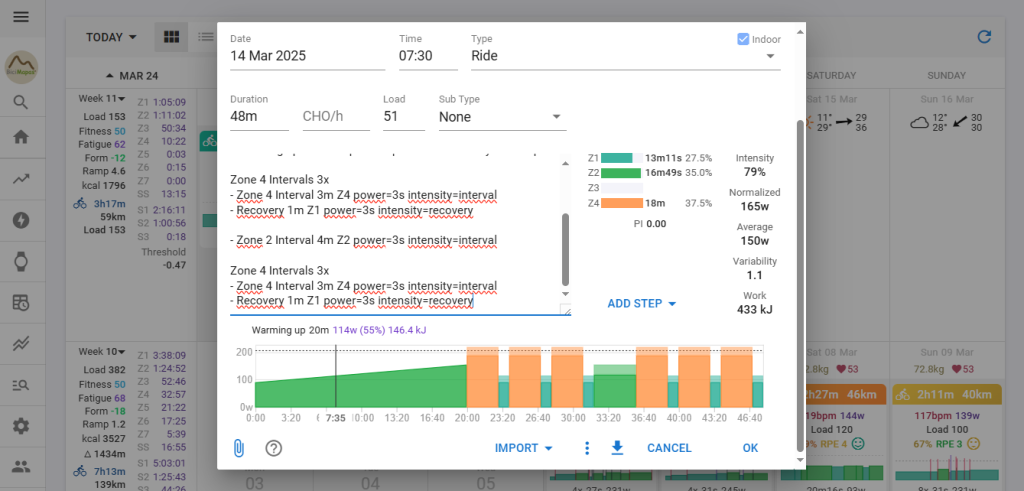
And now the second interval set has the targets we want, as shown here
The final part of the workout is the cooldown that is entered as follows. Add a space below the last interval repeat to make sure it is not added to them.
Click on ADD STEP to continue.
In Type we select Cooldown.
In Duration enter the time, 9 minutes in this case as 9m.
As it is a power-based workout, we select the POWER tab.
In the Power drop down menu, select Zone Range, Start with Z2 (zone2) and finish in Z1 (zone1)
In Text to display to athlete enter any text that you would like to see in the device to identify this step. We entered You are almost done.
And in Intensity, we select Cooldown.
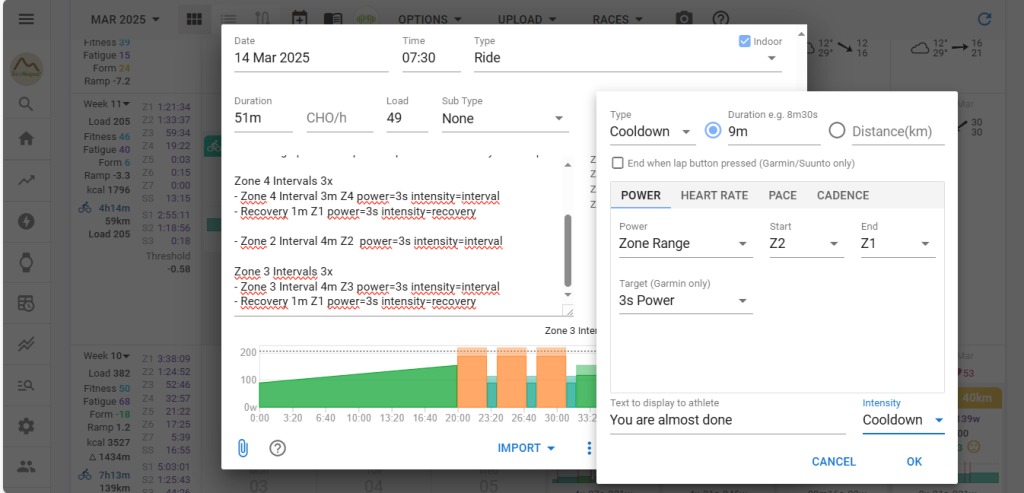
Click OK.
The step is added to the description and graph sections.
Step 6
Intervals.icu supports to add cadence as a secondary target in each section of the workout.
Setting this up requires manual editing in the text editor for each workout step, as we could not find an option to do it through the graphical interface.
Here’s how to do it:
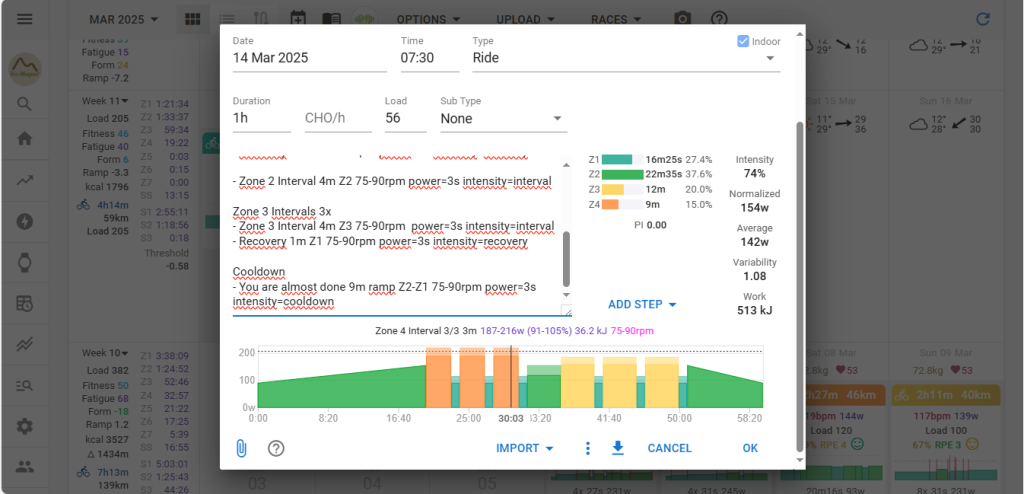
For each step of the workout we want to maintain a cadence of 75 to 90 rpm as a secondary target.
In each step, after the zone target, manually add the following code
Enter a space followed by “75-90 rpm.”
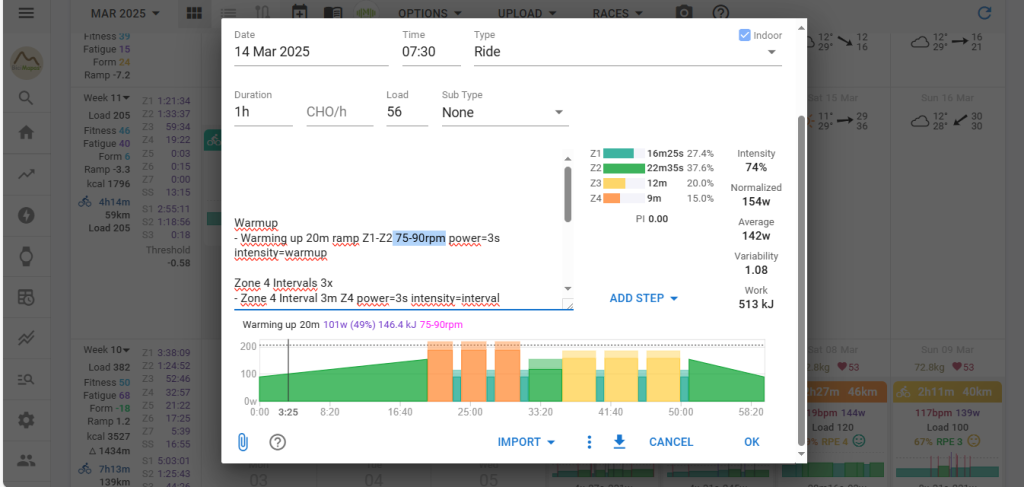
This will set the cadence as a secondary target. You can see the cadence target range when scrolling through the chart.
And this is how it shows in Garmin
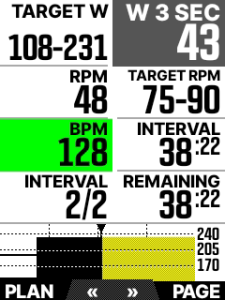
and in Wahoo
Step 7
Save Workout by clicking OK. The workout will be added to the calendar, where you can also see the estimated Load it will have.
Assuming you have already set up your device connection with the platform, it will also be sent to your Garmin, Wahoo or other device you may have set up to upload workouts from Intervals.icu.
This is how it looks in the Wahoo companion app ready to be sent to the device.
Notice that Wahoo does not honor the ramp up on warmup and ramp down in cooldown that we programmed.
And this in Garmin Connect also ready to be sent to the device.
Notice that Garmin does not honor the ramp up on warmup and ramp down in cooldown that we programmed as well.
Now you can create your workouts in Intervals.icu and use them in your compatible training device.
If you want to go deeper into planned workouts in this platform, check out our Advanced Cycling Planned Workouts in Intervals.icu Video Tutorial
To support your self coaching journey get our free guides that you can download right now, including
The Self-Coached Cyclist Training with Power: Concepts
Cycling Fitness CTL Planning Worksheet
The 2025 Cycling Fitness TSS & CTL Planning Worksheet
As well as our full featured eBook The Self Coached Cyclist Training with Power, covering everything from training concepts to performance tracking.
and check out our Power Based Training Plans.